|
|||||
|
 |
Launching Win Acc
Run the winacc.exe application from your install directory
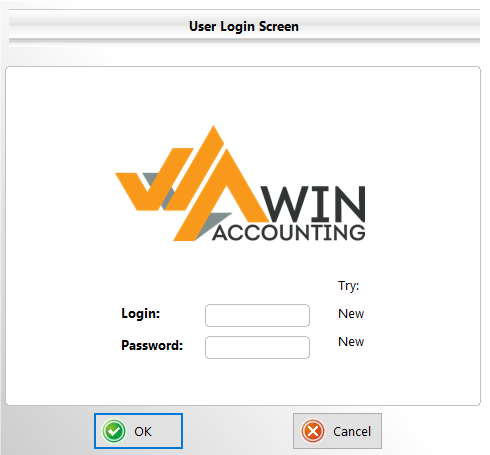
Login using your unique Login and Password
When Logging in for the first time, use "New" for both the Login and Password
You will then have the ability to create a unique login
(keep this safe & confidential)
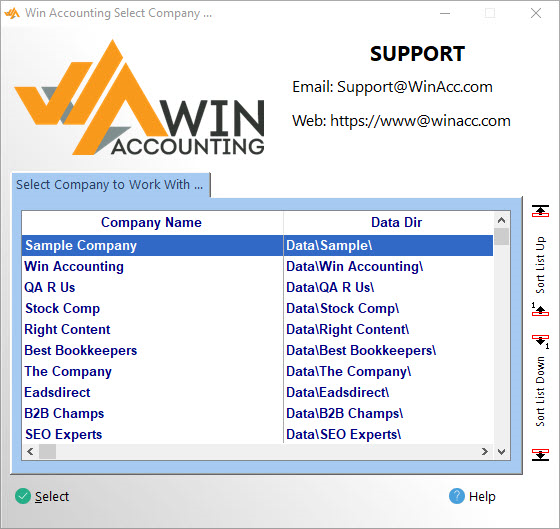
Once you've logged in, the "Win Accounting Select Company" window will open
|
 |
Inserting/Selecting Company
To Add a New Company, go to File > Select Company
(this window will also automatically open when you log into Win Accounting)
Add a new company by Right Clicking anywhere in the white space below the “Sample Company” and clicking “Insert”
Enter your company’s name and press Tab for the system to automatically create a Data Folder location
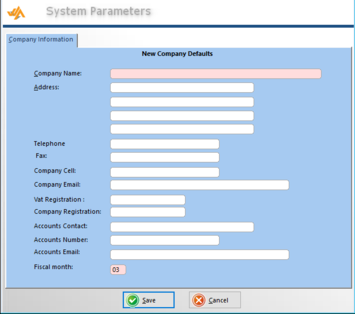
The easy one-page System Parameters window will automatically open after creating a new company
Select your newly created company by double clicking on it in the list
(or by highlighting it and clicking the “Select” button)
|
 |
One-Page System Parameters Window
The easy one-page System Parameters window will automatically open after creating a new company
Everything with a pink background is a required field
The information entered on the this window is relevant across all modules for the selected company
Take note: each module has additional System Parameters with module-specific defaults that can be modified by selecting the module and navigating to System Settings > System Parameters
Fill in all relevant company information and click “Save” to continue
|
 |
System Parameters
Access your System Parameters by navigating to System Settings > System Parameters
Take note: the “System Settings” menu button will only be visible when
on the module’s main menu screen
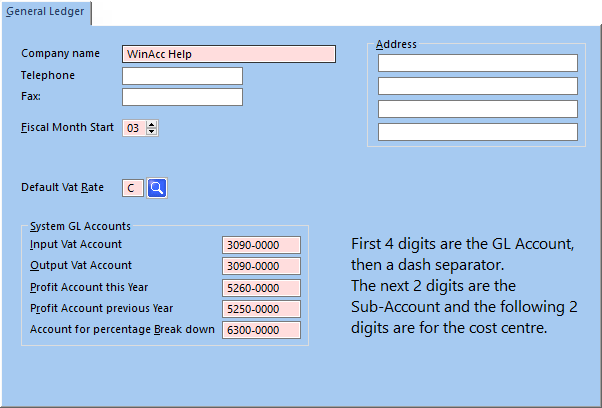
Besides general company information, you'll also be required to set your Fiscal Month Start, as well as your Default VAT Rate
You'll then be required to enter account codes for the relevant General Ledger Accounts - These codes will automatically be populated with default account codes, designed to match the account codes from the Sample Company Master Code List (see below for more information)
Note: these System Parameter GL Account Codes are flexible and can be modified during setup, should it be required
As described in the screenshot, the first 4 digits is the GL Account, followed by a dash separator, the next 2 digits are the Sub-Account, the final 2 digits refer to the Cost Centre
|
 |
Creating a New User
Win Accounting allows for Multi-User functionality
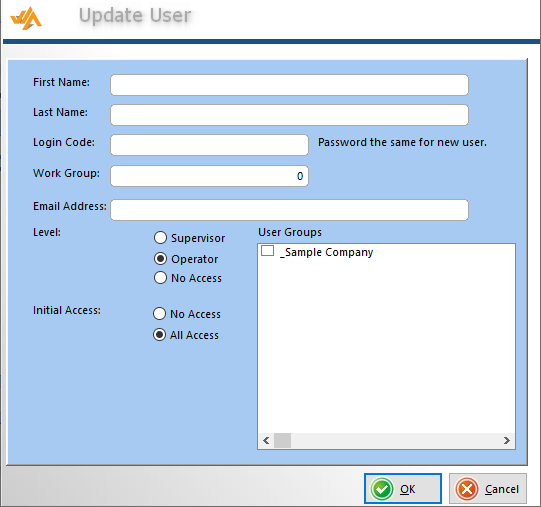
After logging in with the “new” “new” details, you can easily create a new user
To add a new user, click Option > Security Menu and then Browse User
Here you’ll see a list of all the current users
Add a new user by clicking the “Insert” button
Take note: When first creating a new user, their password will be the same as the Login Code/Username - The user will have the option to change their password when they first log in
Your Win Accounting licence allows for 5 unique users - speak to your Win Accounting Agent or contact Win Acc Support to unlock additional user slots
|
 |
Changing Your Password
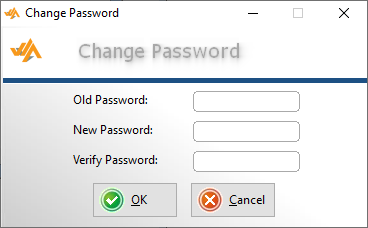
Change your password by going to Options > Security Menu > Change Password
Enter your Old/Current Password and your NEW Password
Verify your New Password and click “OK” to save
|
 |
Accounting Period
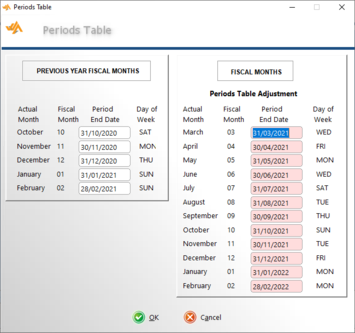
While your fiscal period start month (Accounting Period) is set in the one-page System Parameters Window after first inserting your company, if required, these dates can be modified by opening the General Ledger module and navigating to System Settings > Periods Table
Here you can easily change the specific month-end day for each financial month
Should you wish to modify the fiscal period start month to a different month than what was initially set in the one-page System Parameters window, this can be done quickly and easily by doing the following:
To fully clear/edit your periods table, press Alt+C to clear the first Period End Date - adding a new date, and pressing Tab will cause the rest of the period dates to automatically update (based on the newly inserted date)
|
 |
Accounting Date
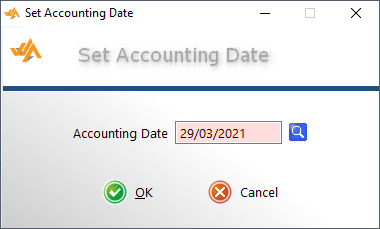
Easily set your desired Accounting Date using the System Settings dropdown - Or by pressing the F2 key when in a module’s main menu
Setting your default accounting date will help you speed up the process of capturing data
Document dates are flexible though, and can be changed on the fly, during document creation
|
 |
Copying the Master Code List
To help speed up the General Ledger setup process, Win Accounting ships with a "Sample Company", containing all the typical Accounts that you would require to use the GL Module
The Sample Company's Chart of Accounts / Account Code List can easily be copied into your New Company, making it easy for you to simply begin posting Transactions and printing Financial Statements
Copy the Master Code List by Selecting the Main General Ledger Module and clicking on the Utilities Menu Option at the top of your screen
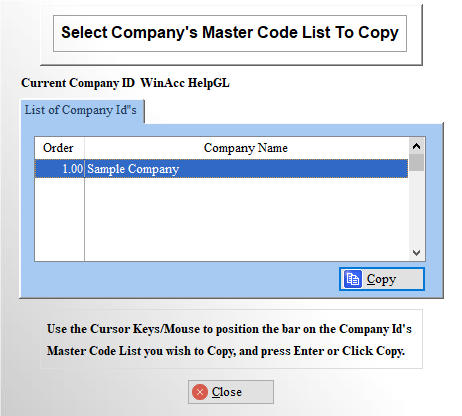
Selecting the "Copy Master Code List" menu option will pop up the screen seen to the left
Identify which Company you will be coping the code list to using the "Current Company ID" section
From here, highlight the Sample Company (or any other existing company) and click "Copy"
Note: this will copy, but not replace, accounts into your Chart of Accounts - accessible on the GL Maintenance Tab
|
 |
Using the Maintenance Tab
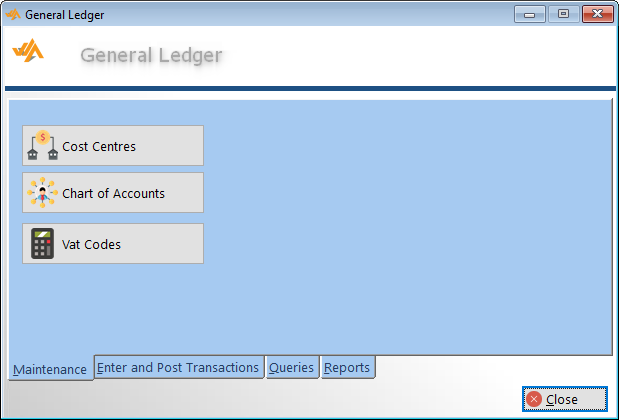
The "Maintenance" tab allows you to easily manage and maintain your General Ledger
Add, modify and maintain your Cost Centres, Chart of Accounts and VAT Codes with ease
The 2-digit Cost Centre Code can be added to your Account Codes (final 2 digits of the 8-digit account code) - use this to gain greater insight and analysis through General Ledger Accounting Reports
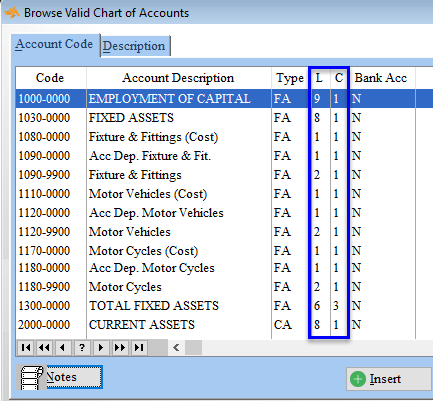
When adding a new account to the Chart of Accounts, easily set your Account Column (how it should appear in your Balance Sheet Report), as well as the Account Level - see more information regarding Account Level below
Win Accounting has a number of built-in VAT Codes, although these are flexible and can be modified / new VAT Codes can be added, as you see fit
|
 |
Account Levels
Account Levels are important as they tell the GL Module how and where each account should appear in the Balance Sheet
Account Numbers will affect the order in which your accounts appear on your Financial Reports, so keep this in mind when setting your account code ranges, should you have to add additional accounts down the line
Keep in mind that data can only be entered and captured on Level 1 Accounts
Account Levels are broken down as follows:
Level 1: Detail/Data Accounts
Level 2 - 6: Account Totals (no underlining)
Level 7: Account Total (with double-dotted total line around account total)
Level 8: Heading Only (with single-dotted line beneath)
Level 9: Heading Only (with double-dotted line beneath)
Find more in depth details about Account Levels & Columns
|
 |
Enter and Post Transactions Tab
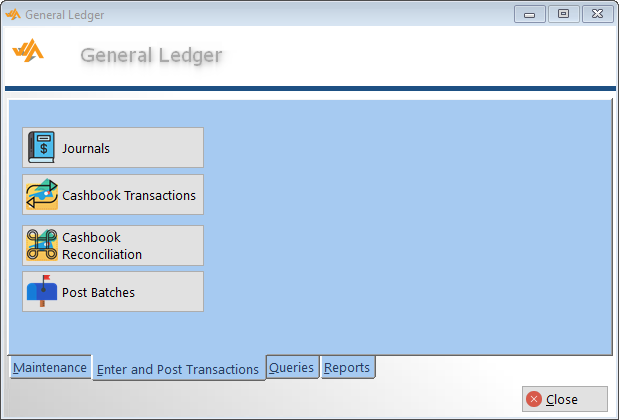
The "Enter & Post” tab makes transaction processing easy!
Capture unlimited Journal and Cashbook Transactions, deal with Cashbook Reconciliation, and post all batches with a simple click of a button
Before Entering & Posting Transactions, first create a General Ledger and/or Cashbook Batch – this is necessary to provide valuable information to and from all your integrated Win Accounting modules, enabling your Accounting Reports to present meaningful data and analysis
Find more details regarding Batch Creation below
Find more details about using the General Ledger Enter & Post Transactions section
|
  |
Batch Creation: General Ledger and Cashbook Batches
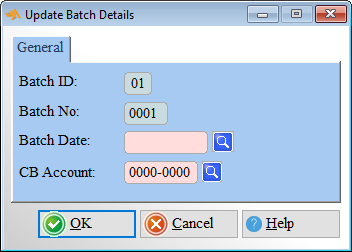
When selecting "Journals" or "Cashbook Transactions" from the Enter & Post tab, you'll first need to create/select a Batch before you can enter any transactions
Do this by entering your Batch Number in the area provided, or by using the "Batch Lookup" button
To create a New Batch, click the Lookup Button and then click "Insert" to add a New Batch
The Batch ID (the logged in user's ID), and the Batch Number will automatically populate based on existing batches
You'll be required to enter a Batch Date and select the Cashbook Account relevant for this batch / the transaction entries that will be added to it
Once a batch is selected, you can begin entering and posting your transactions
|
 |
Reconciling Accounts
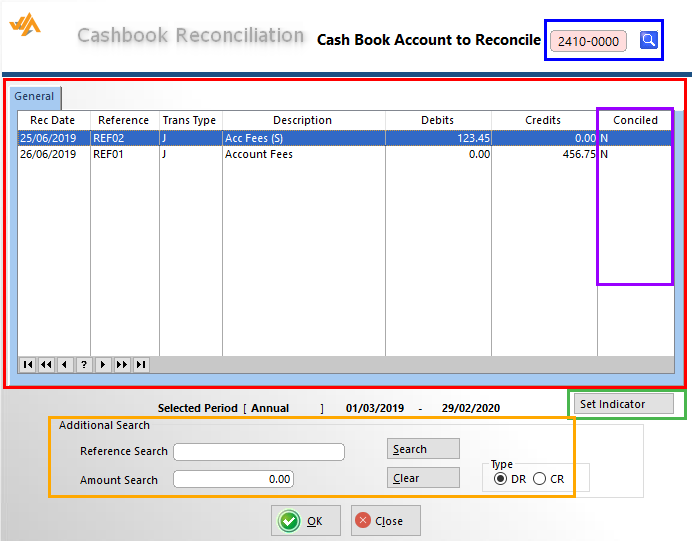
The Cashbook Reconciliation section makes it possible for you to easily identify and indicate which payments have actually been received, and which are still awaiting receipt
Select your desired Account using the Account Lookup button – Once selected, a list of posted transactions will appear in the General Tab
Items listed there can be compared with your Bank Statement – Reconcile transactions by highlighting it and clicking “Set Indicator” – This will change the “Conciled” column for the transaction from “N” to “Y”, indicating that the transaction has been reconciled
Use the Additional Search Criteria to quickly and easily pinpoint your desired transaction(s)
|
 |
Queries Tab
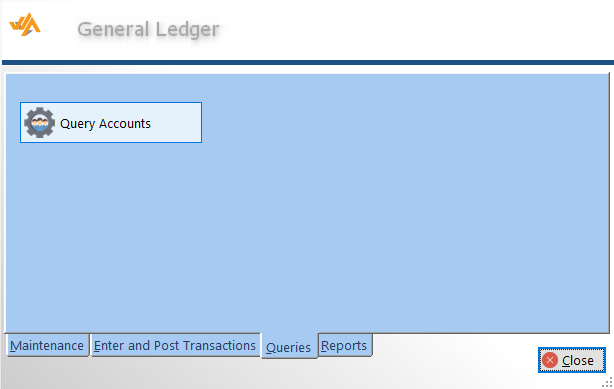
The General Ledger "Queries" tab enables you to easily request important Accounting & Transactional Data for every Account, allowing you to keep track and receive a comprehensive “big picture” of the financial health and activity of your business
Select your desired Account to easily view all posted transactions, with all its relevant data, including Transaction Date, Cashbook Account Code, Transaction Type, Transaction Description and Reference, as well as the Specific Amount (either Debited or Credited)
Account Query will also indicate the selected account’s Opening Balance, Prior Year Balance and Current Balance
Easily view and/or compare the Actual Amounts with that of the Budgeted and Forecasted Amounts (as set in your Chart of Accounts section)
|
 |
Reports Tab
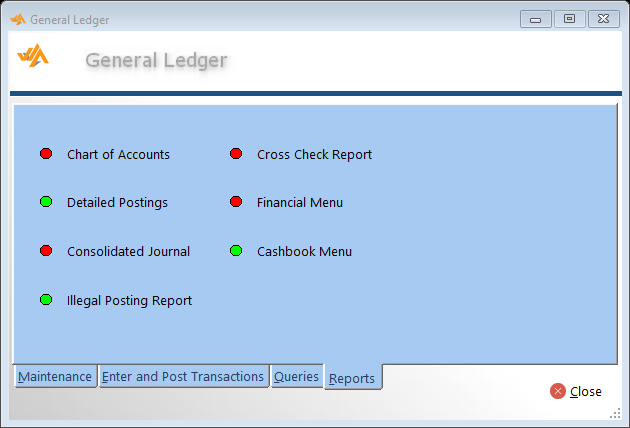
The General Ledger "Reports" tab provides an extensive list of flexible Accounting Reports, allowing you to better visualise and connect with your business data
The Financial Menu contains vital financial statements used for conducting fundamental business and accounting analysis – these include your Trial Balance, Balance Sheet and Income Statement
Win Accounting provides different formats and versions of the Chart of Accounts Report, all providing their own unique and specific analysis
The Detailed Postings Report contains all valuable information regarding every transaction within your General Ledger
The Consolidated Journal Report provides the overall net effect of summed totals of all transactions for each unique account between a specific date range or accounting period
The Illegal Posting Report indicates whether there are any debits with a missing credit - or vice versa
The Cross Check Report provides a list of General Ledger Account Codes which have been referenced by the Transaction File, but no longer appear in the Master File Definitions
Use the Cashbook Menu to find a selection of reports designed to improve the reporting and analysis of your various cashbooks
Find a more in depth guide on using the large array of Win Accounting General Ledger Reports
|
