Create unlimited orders quickly and easily using Win Accounting's smart Debtors Control Document Capture
All necessary customer details, such as Delivery Address, Area Code, Default Salesman and more, will automatically be populated once the desired debtor is selected
Customer, Delivery and Pricing information is flexible when capturing a new order, meaning that all details can be modified on-the-fly, should it be required
Choose from our fully customisable Order Document and Picking Slip templates, enjoy unlimited order creation, import and export order notes with ease and save time with easy stock integration
Use the Document History/Analysis Report to quickly and easily view a history of all orders
Orders act as an informational document for recording purposes, with their data being fed into an array of accounting reports - aiding you in better visualising your sales data
Creating an Order:
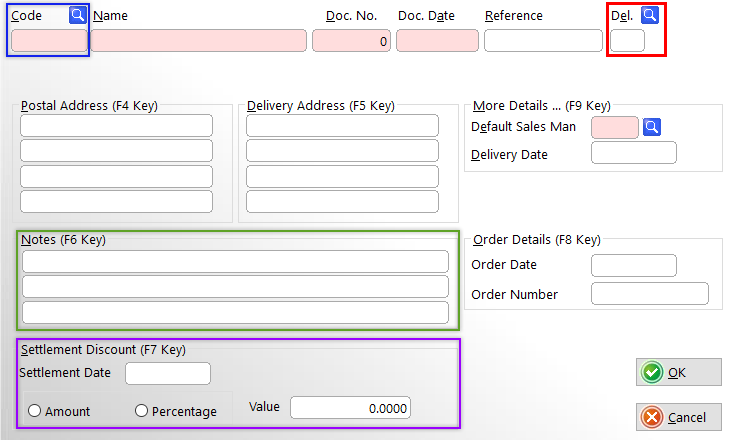
Selecting Customer
As with all Document Capture, when inserting a new Order, before you can start adding line items, you'll first need to select which customer the order belongs to - this can be done by entering the Debtor Code or by using the handy Debtor Lookup Button
Once a customer is selected, all general information regarding the debtor, such as debtor code & postal address will automatically populate the window
Choose the relevant Delivery Address for the Order by using the Delivery Lookup Button, or by entering the Delivery Code
You'll also have the option here to enter/modify the Order Document Number, Date and Reference, as well as the, Default Salesman, Order and Delivery Date and Order Number
Here you can also set the Settlement Discount Terms for the order, as well as any Notes pertaining to it
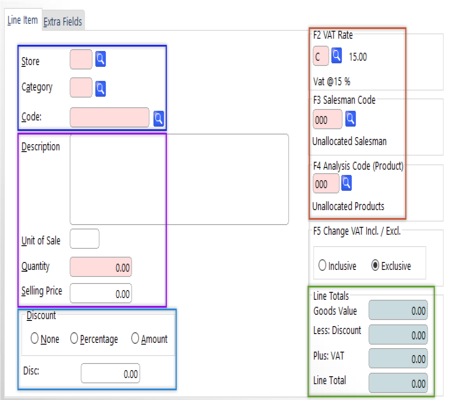
Adding a Line Item
If your Win Acc Debtors Control and Stock Control modules are integrated, easily select the relevant Store, Stock Category & Stock Item
All necessary information (including pricing information) will automatically populate based on the information added in the Stock Control Module
If you're not integrating with the Stock Control Module, easily add the relevant Line Item Description and Pricing Information
Add a unit of sale, the product quantity & selling price and whether it's VAT Inclusive or Exclusive, and let the software automatically Calculate the Line Total
While the Default Salesman is set in the previous "Selecting Customer" window, and the Default VAT Rate set in the module's System Parameters, both these options, along with the Product Analysis Code are flexible and can be modified on-the-fly
Set the line item's Discount Type and Amount easily
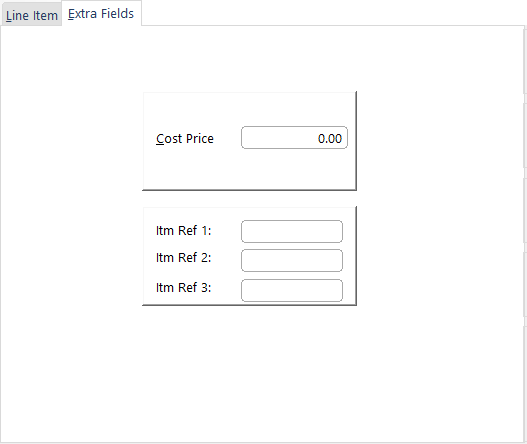
Adding a Line Item
Extra Fields Tab
While Cost Price information will be automatically populated if integrating with the Stock Control Module, this amount is flexible and can be easily modified on the "Extra Fields" tab when Adding a Line Item
Besides Cost Price, this section also provides a space to add any additional Item References or Notes regarding the specific Line Item
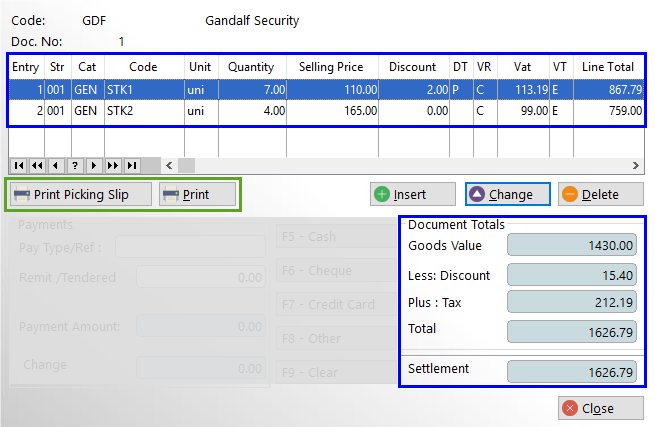
Reviewing Line Items and
Adding Ad Hoc Payments
Review the Line Items and Document Totals quickly and easily for the selected Order
Export and/or print an Order Confirmation and/or Picking Slip with a click of a button
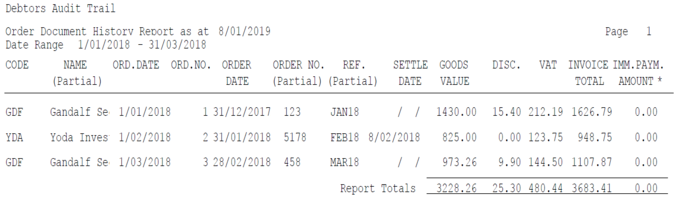
Order Document History Report
The Order Document History Report consolidates and displays all orders, across your Accounts Receivable, allowing you to easily view and keep track of every order:
This report provides valuable and concise data regarding your orders, including the relevant Debtor Code & Name, Document Date & Number, Order Date & Number, as well as the Document Reference, Settlement Date details and relevant Accounting Information